3 pieces of pottery (30 hours)
I have always been interested in pre-Columbian vessels- that was my inspiration for these 3 pieces.
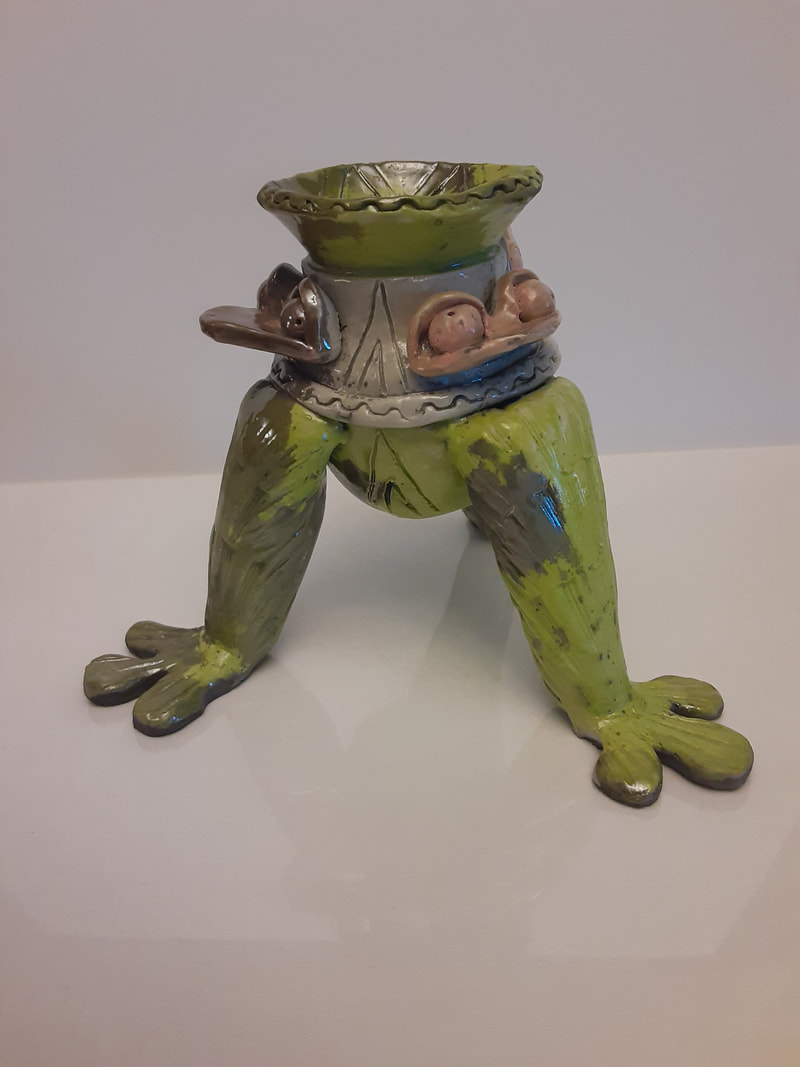
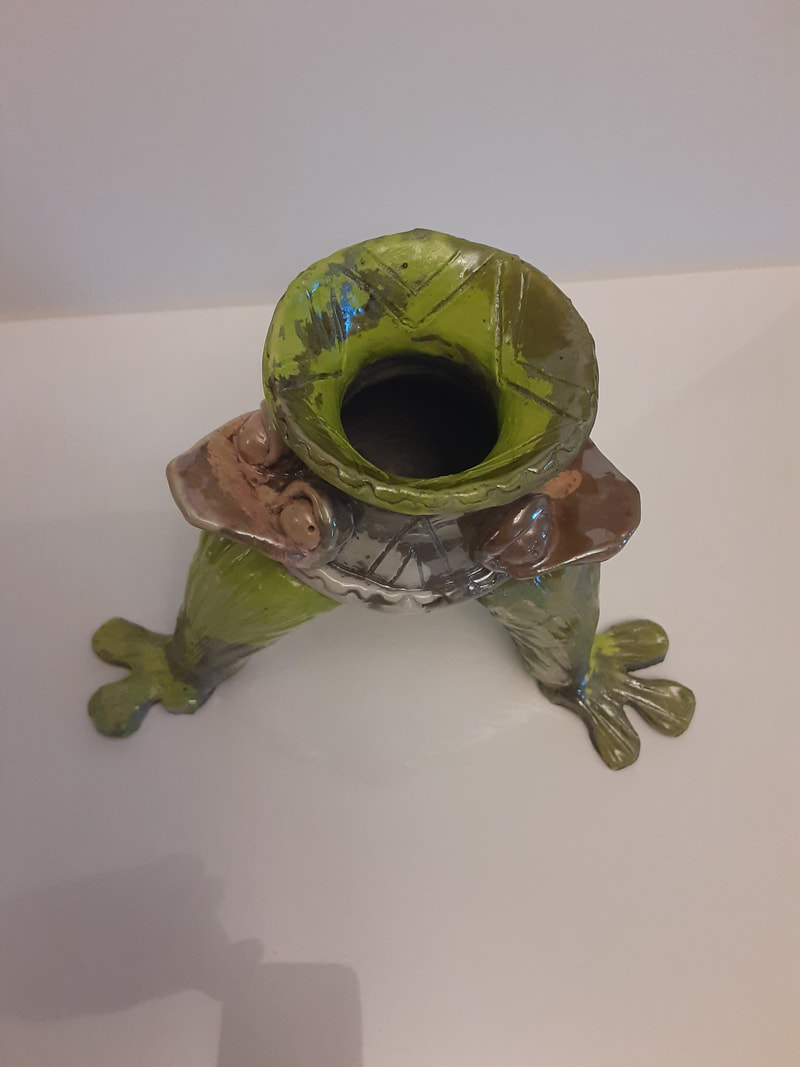
#1. Frog Vessel- 3 obnoxiously footed vase with detailed collar that has frog face forms.
*underglaze neon green (3 coats) on collar and legs
*underglaze peach (3 coats) on frog faces
*1 coat white crackle
I loved the way this turned out. The form is silly, but shows tons of fun details. The raku firing, with all of it's surprises and imperfections, made this look like an artifact from some forgotten whimsical empire.
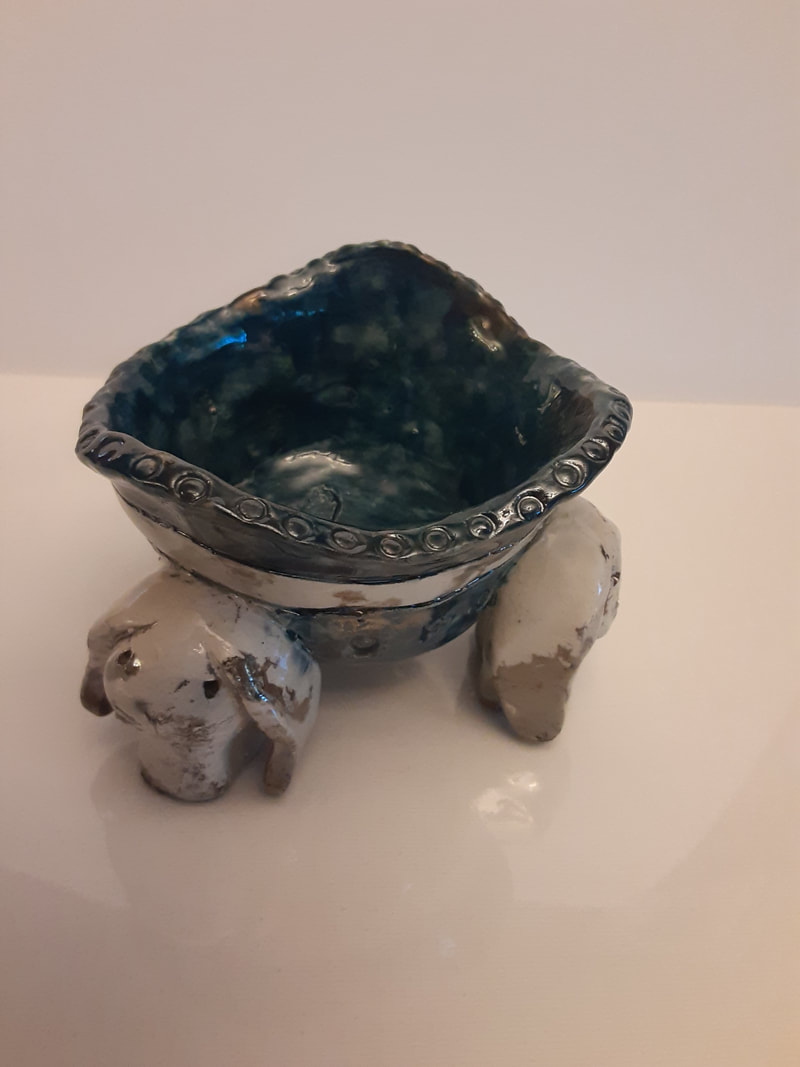
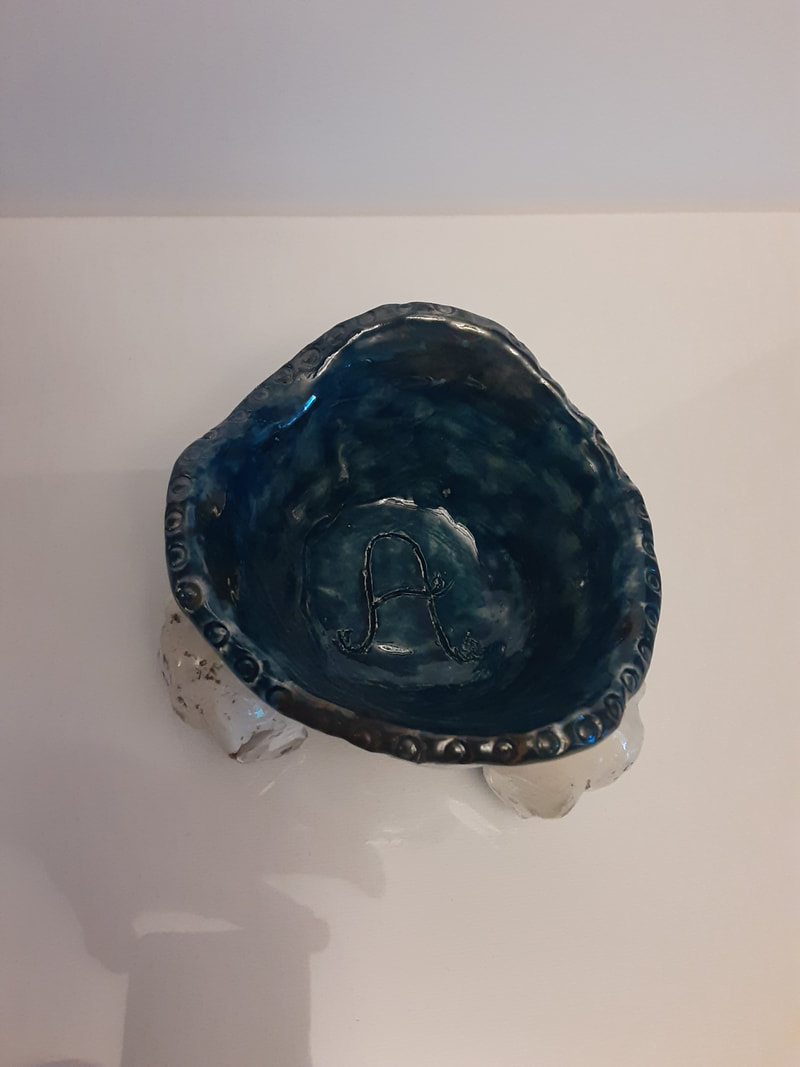
#2. Bunny Vessel- 3 footed detailed pot with bunnies, the "A" carved into the pot stands for "Anderson" and the name of my prized stuffed animal "Anthony"
*underglaze indigo (2 coats)
*1 coat white crackle
I definitely needed 3 coats of the indigo underglaze. I didn’t like the brush strokes you could see in the glaze on the finished product. However, the overall effect of the white crackle was super fun and again, artifact-like. If I would do this again I would create the object larger, this little pot is barely above 4".
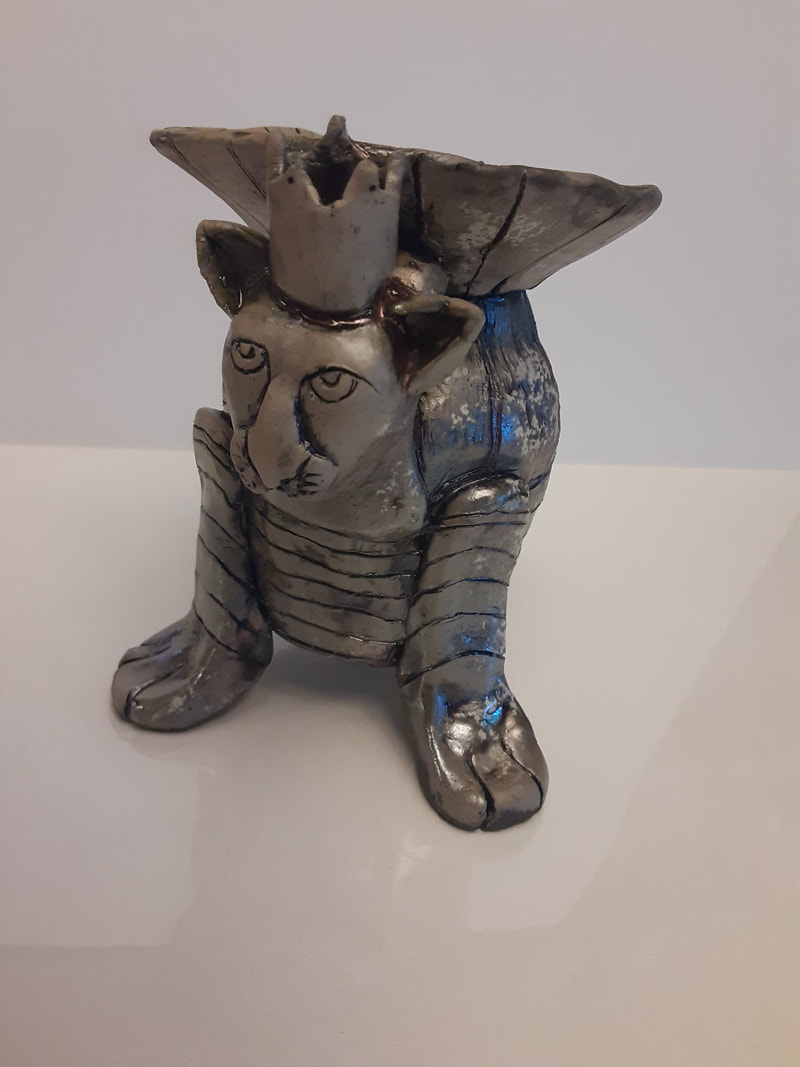
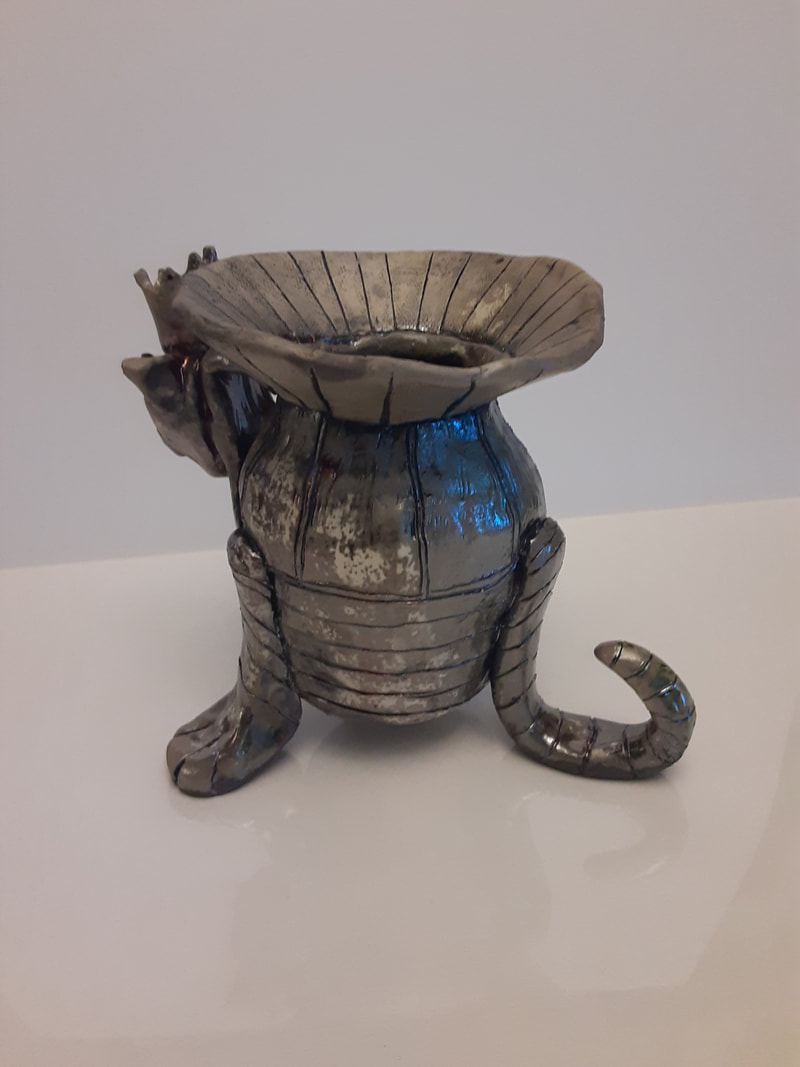
#3. Lion Vessel- again a 3 obnoxiously footed vase with raised collar, detailed, with crowned lion form coming forward.
*underglaze black (1 coat), wiped off
*Michigan patina (1 coat), wiped off
*1 coat white crackle
I loved the way this pot turned out--- maybe I didn’t need to do the black underglaze, interesting experiment to be had though, whether the black underglaze made the difference or the raku glaze? I've really enjoyed how the raku firing creates the metallic glints where the carved lines are.
Journal entries and reflections (20 hours)
General Notes:
*Greenware that has been wheel thrown can take glazing better because it can handle the reintroduction of water better.
*Continental clay, Minneapolis
-Raku clay
-Buff stoneware with HS kids
*Georgie’s Ceramics (Glazes)
-White crackle
-Michigan patina
-Midnight luster
-Blue dolphin
-Bettlejuice
-Apple crackle
-Pipenburg red bronze-----this was new for me, lovely color, definitely red/rusty color
Slump molds creator- Larry Hadner—641-485-2673
Review Notes:
*guarder sticks for rolling slabs
*”bag pot” versus “pocket pot”
-if you want to hang you must use holes
-balls placed at corners helps prevent cracks because it changes the surface tension of the pocket. Can stamp the balls, add decorative details, etc.
*stretch clay to make sure the side you “see” is thin
*clay shrinks 10-12% from earthenware to bone dry
*pinch pot goals (3)
1. learn to pinch
2. glaze tests
3. textures
*slump mold
-slabs that are “dropped” into place using a wooden mold
=small drops
=if you need to touch inside, use damp sponge
=control overlaps—if you are using 2 different textured clay slabs to create the slump mold, do not overlap very much of the clay. It will create uneven drying, warping, heave look, etc.
=use wet sponge to clean edges before jagged edges become too dry to alter
New Ideas:
* use 2 different slabs with different texture dropped into slump box. Different glazes on each side to encourage contrast.
Patterns—watch top and bottom, if the bottom is too skinny it won’t stand
1. cut out 2 patterns
2. use metal rib to score and give edge of pattern an angle (like a bevel)
3. put slip on edges with a brush
4. glue sides together
-use coils inside if you want to secure form
-don’t use textured side of scraps for a bottom because it scratches the table
-put slip on bottom and set on base slab, cut excess off, roll bottom on table to secure and undercut base.
-lid option: flat slab, cylinder underneath to “catch lid,” then create another flat slab to sit perpendicular as lid handle.
Handle
1. carrot shaped coil with tapered end
2. use clean board to roll over and get rid of finger prints *tip is to use a wet cloth/canvas for this step, it won’t dry out the coil as much.
3. use clean board to “stamp” 45 degree angle on both sides of the coil, sort of like a pyramid shape
4. push/stamp details in center of pyramid OR on both side OR both (Kirk used a rope stamp on the sides of the pyramid, then a stamp up the center)
5. do a bevel cut on top and bottom part of handle, slip/score to attach to pot
6. stamp the handle at the top and base to secure
Vocab:
Wooden rib- used to smooth vessel walls
-also have metal ribs, rubber ribs, etc.
Naked raku- paint slip over bisqueware, fire, pull out of kiln around 1200 degrees, put in garbage cans with ash, no quenching. Take pots out and let cool, then peel off slip using various tools) credit cards, metal ribs, etc).
-produces smoky effect, not lightening or crackly lines like horse hair firings.
Kirk Quotes:
“Let it become your picture”
-pottery doesn’t’ have to be functional
“I believe in slip, I use a lot on things.”


2 lesson plans
“Carrot” Handle
Grades: 9-12th
Length: 1 school day
Objectives: Students will create a specific handle used for vessels and platters.
Builds Upon Previous Knowledge: Students have used clay, created coils, and worked with the required tools before.
Procedures: 1. Discuss the project: show examples of several pieces with numerous variables.
2. Demonstrate/review how to roll a coil with a tapered end. If a wet canvas is available, discuss why that would be important (coils dry and crack fast, if a wet canvas is used the coil won’t dry as fast). Use a clean Masonite board to roll over coil, slightly compressing, to get rid of finger prints. Use the board to press a 45 degree angle on either side of the coil. This creates a pyramid-like effect. The top of this pyramid coil can then be cut or stamped. Textures can be applied to either side of the pyramid coil by rolling up the angle. Create a bevel cut on the top and bottom of the handle once the shape is chosen (model how many shapes can be created with handles). Slip/score and attach. Stamp to secure the top and bottom of the attached area- this just gives added support to the structure. This can be done with actual stamps or clay pieces that get attached and stamped.
4. Discuss issues with this particular technique: the biggest issue is time and moisture. The student must finish the handle before it suffers from drying and cracking. They should be prepared with tools and design ideas BEFORE they work. The handle should be the last part of the clay assembly, putting bags over clay projects is very difficult.
5. Discuss future glazing possibilities to encourage contrast or unity with color/finish in corporation with the already present textures.
6. Student work time.
Materials: Clay, vessel that handles will be attached to, textured fabrics/plates, etc, smooth board, ceramic cutting tools, plastic bags, boards.
Slump Mold Drop Boxes
Grades: 9-12th
Length: 5 school days
Objectives: Students will create individual slab platters using slump molds, texture materials, and previously gained ceramic knowledge.
Builds Upon Previous Knowledge: Students have used clay and the required tools for slabs before.
Procedures: 1. Discuss the project: show examples of several pieces with numerous variables.
2. Discuss the slump mold: how it will be used, how it keeps finger prints to a minimum, how far to drop, where in the room to drop, different ways the lip can be cut, feet, added details, how to protect the clay from cracking (timing of releasing the mold), etc.
3. Demonstrate/review how to roll a slab using textured fabrics, if we have slab guards use them to keep the thickness of the slab consistent. Show how to slip/score 2 different slabs, lay them over the slump mold, and drop the mold. Trim edges, add feet/details. Fully demonstrate how to wrap and protect project if more time needed OR how to release slab from mold, wipe edges with wet rag to smooth.
4. Discuss issues with this particular technique, show examples so students understand: too much clay overlapping (drying and form issues because of thickness differences), trimming edges too close or making edges too thin (risk chipping corners), etc.
5. Discuss future glazing possibilities to encourage contrast or unity with color/finish in corporation with the already present textures.
6. Student work time.
Materials: Clay, rolling pins, slab guards, slump molds, textured fabrics/plates, etc, ceramic cutting tools, plastic bags, boards.
